TestRail, the leading test management suite, joins Bespoken to bring together the best in testing and automation for voice applications. This is an exciting new space, one that will benefit greatly from the proven tools provided by TestRail used in conjunction with Bespoken’s voice apps innovative testing approach.
In this article, we’ll show you how to implement voice app testing. And why should you? Doing this will let you:
- Save time by significantly boosting voice app testing productivity
- Get real-time insights into your voice app testing progress
- Efficiently manage voice app test cases, plans, and runs
- Integrate voice app delivery with your issue tracker through TestRail
For this, we’ll set up a test project in the intuitive and easy-to-use TestRail suite. Then you’ll learn how to do end-to-end testing with Bespoken tools. Finally, you’ll see how to record your test results on TestRail to keep track of your testing efforts.
1. Initial setup of tools
A. Create your TestRail and Bespoken free trial accounts
1. TestRail
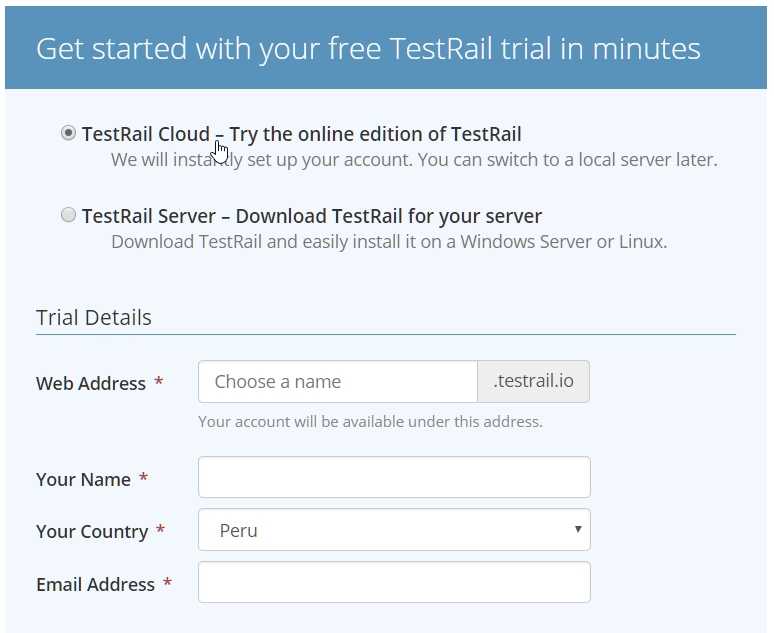
Go to https://secure.gurock.com/customers/testrail/trial/ and select TestRail Cloud, then fill in the form and click on “Create TestRail Trial” button. Complete the registration process by verifying your email.
2. Bespoken
B. Get your Virtual Device token
Bespoken Virtual Devices are the core components to perform end-to-end testing and monitoring. A Virtual Device works like a physical device, such as an Amazon Echo or Google Home, but with the important difference that it exists only as software. With the Bespoken Dashboard, you can create and manage a fleet of Virtual Devices.
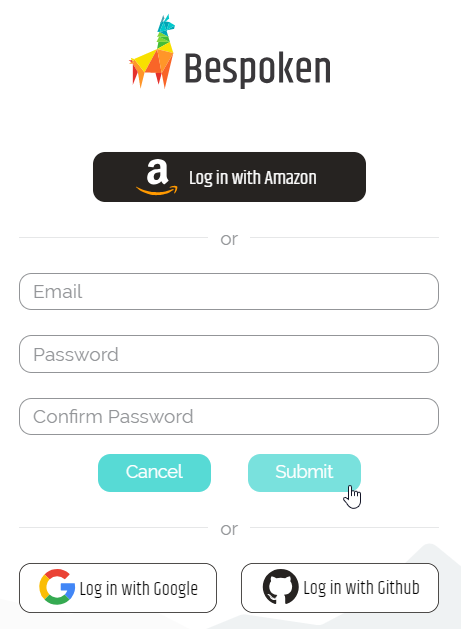
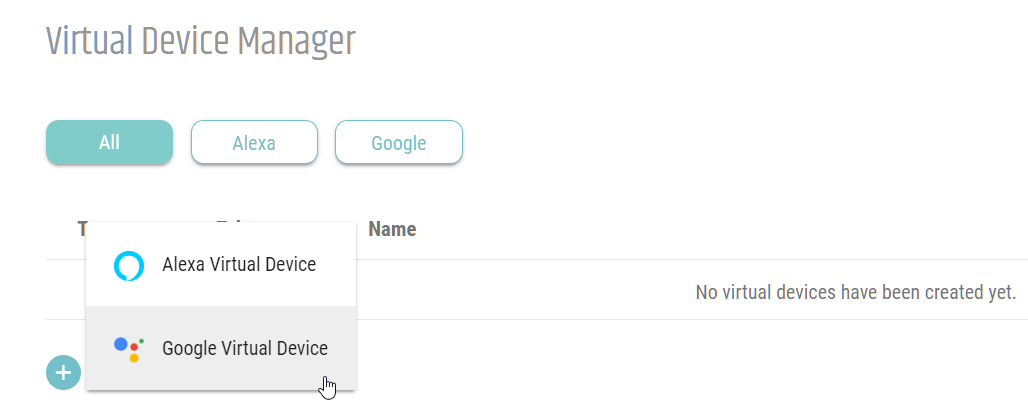
Log in to the Bespoken Dashboard, then click on the “Virtual Devices” tab.
Click on the + icon and select the platform for the Virtual Device.
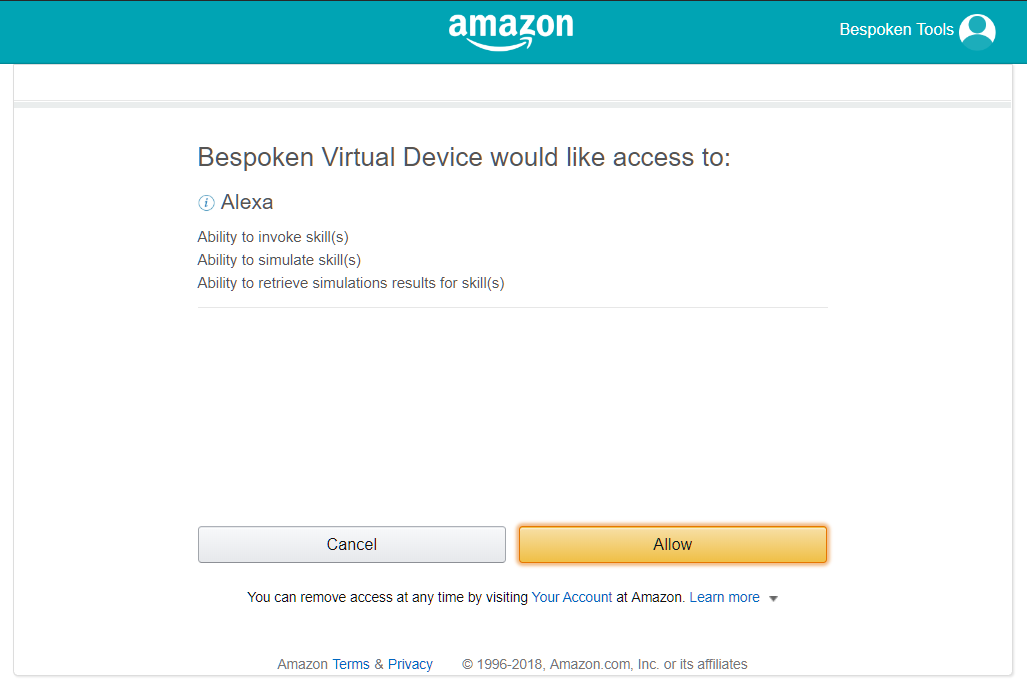
Add your credentials and accept the permissions request.
After allowing access you will return to Bespoken dashboard and the “Virtual Device Token” will be retrieved automatically.
C. Install Bespoken CLI
$ npm install -g bespoken-tools. Please be sure you have installed node.js on your computer. To verify your installation, execute $ bst on your command line. You should see something similar to this: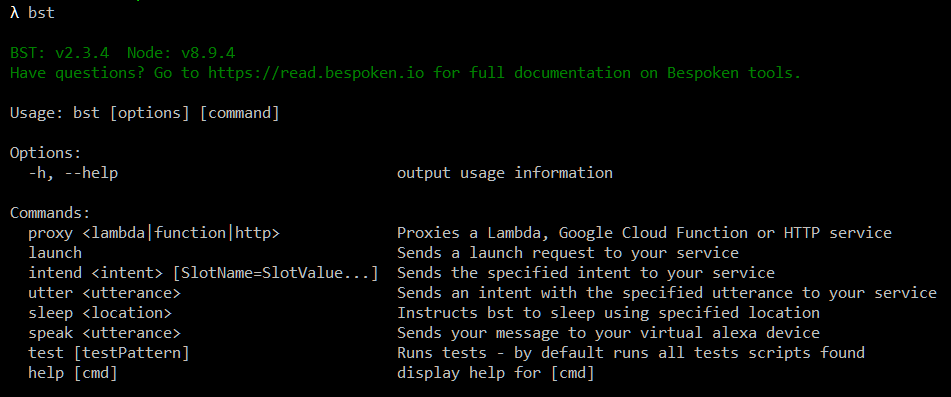
2. Creating a test project on TestRail
The first thing is to create a test project to manage your test activities and record the results of your test executions. To do that, click the “Add Project” button on your TestRail Dashboard
Add a name and select the type of project. For the purpose of this article, we are going to select “Use a single repository with baseline support,” which is a common scenario when developing voice apps.
3. Adding milestones, test suites, and test cases
Once your project has been created, you can add milestones. These help keep testing efforts organized by important deliverables within your voice app lifecycle. It’s very simple to create a milestone. Just go to the Milestones tab, select the “Add Milestone” button, and fill in the form.
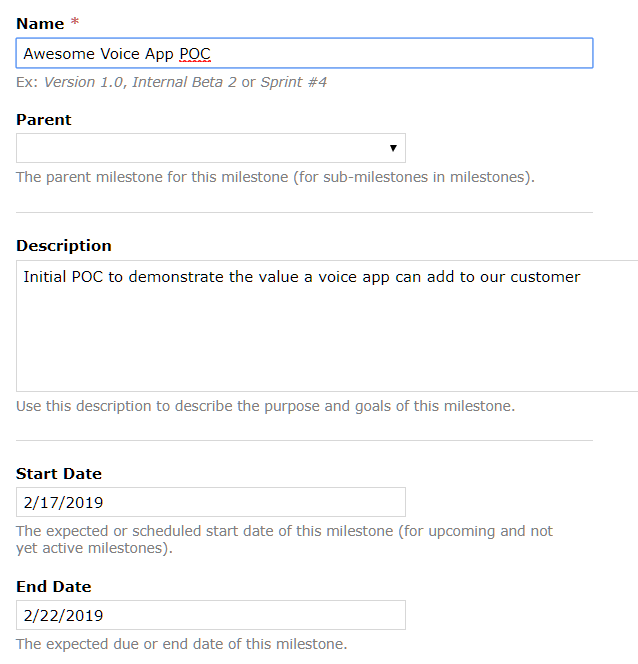
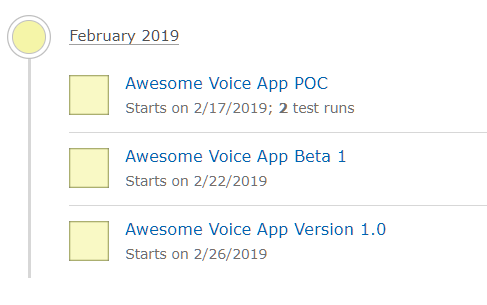
Below is a sample of the milestones you can create:
The next step is to create baselines and test suites. A test suite is a collection of test cases. In this example, we created one master test suit and two baselines to depict the most important environments the voice app is migrated to.
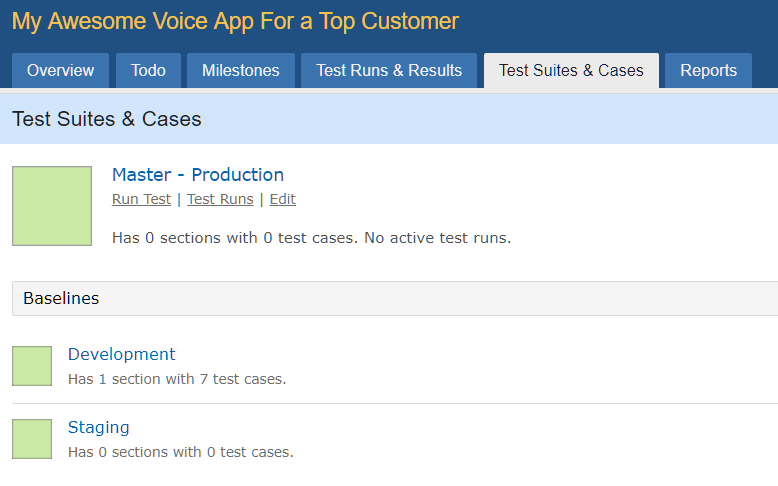
Now, you are ready to create test cases for your voice app. We have two options for this: manual creation or automatic creation.
Below is a sample code for adding our suites and cases automatically (see it online here).
// Get the test rail project ID from an environment variable
const PROJECT_ID = process.env.PROJECT_ID;
// We use the node-testrail-api project - https://github.com/rundef/node-testrail-api - very helpful!
const TestRailAPI = require("testrail-api");
var testRailAPI = new TestRailAPI({
  host: "https://<COMPANY>.testrail.com",
  user: "<USERNAME>",
  password: "<PASSWORD_OR_API_KEY>"
});

let runID;
let testRailSuite; // The current test suite from TestRail being processed - global variable for caching purposes
let testRailCases; // The current test cases from TestRail being processed - global variable for caching purposes

module.exports = {
    // This is called once when we first start the whole suite of tests
    initialize: () => {
        // Create a new run
        const result = await testRail.addRun(
            PROJECT_ID,
            {name: "Bespoken Sample Test Run"}
        );
        // Save off the run ID created by this first step
        runID = result.body.runID;
    },

    // Before the test suite is executed, a test run is created on testRail
    onTestSuiteStart: async (testSuite) => {
        // When we run a suite, we check to see if it has already been setup in TestRail
        // If not, then we create it
        const testRailSuites = (await testRailAPI.getSuites(PROJECT_ID)).body;
        testRailSuite = testRailSuites.find(o => o.name === testSuite.name);
        if (testRailSuite) {
            // Grab the test cases for the suite it already exists
            testRailCases = (await testRailAPI.getCases(testRailSuite.id)).body;
        } else {
            testRailSuite = (await testRailAPI.addSuite({
                name: testSuite.name,
                description: testSuite.name
            })).body;
        }
    },

    // After the test suite is executed, the results are added on testRail
    onTestSuiteEnd: (testResults) => {
        // We loop through each result, and record it in TestRail
        testResults.forEach((result) => {
            bespokenTestResult = result.passed ? 1 : 5; // 1 equals to Passed and 5 equals to Failed on TestRail
            // Look up the case associated with this test
            let testCase = testRailCases.find(case => case.name === result.test.name);
            // If the test case is not found, we create it
            if (!testCase) {
                testCase = (await testRailAPI.addCase(testRailSuite.id, {
                    title: result.test.name,
                    type: 1,
                    priority_id: 1
                }).body;
            }

            // Add the results for this test case
            testRailAPI.addResultForCase(
                runID,
                testCase.id,
                { status_id: bespokenTestResult }
            );
        });
    }
}
Creating test cases manually
As there might be a lot of test cases, it is better to organize them by sections and subsections. A good idea would be to have one section per locale your voice app supports. Then, for each locale, we can create a subsection for each test script. Finally, we can create a test case for each test you have defined in your test script files. It will look something like this:

To create a test case, within each subsection, click on the “Add Case” button and fill out the form.

Add a title, type of testing, priority, preconditions, steps to execute the test case, and the expected result. Then, click “Save Test Case”.
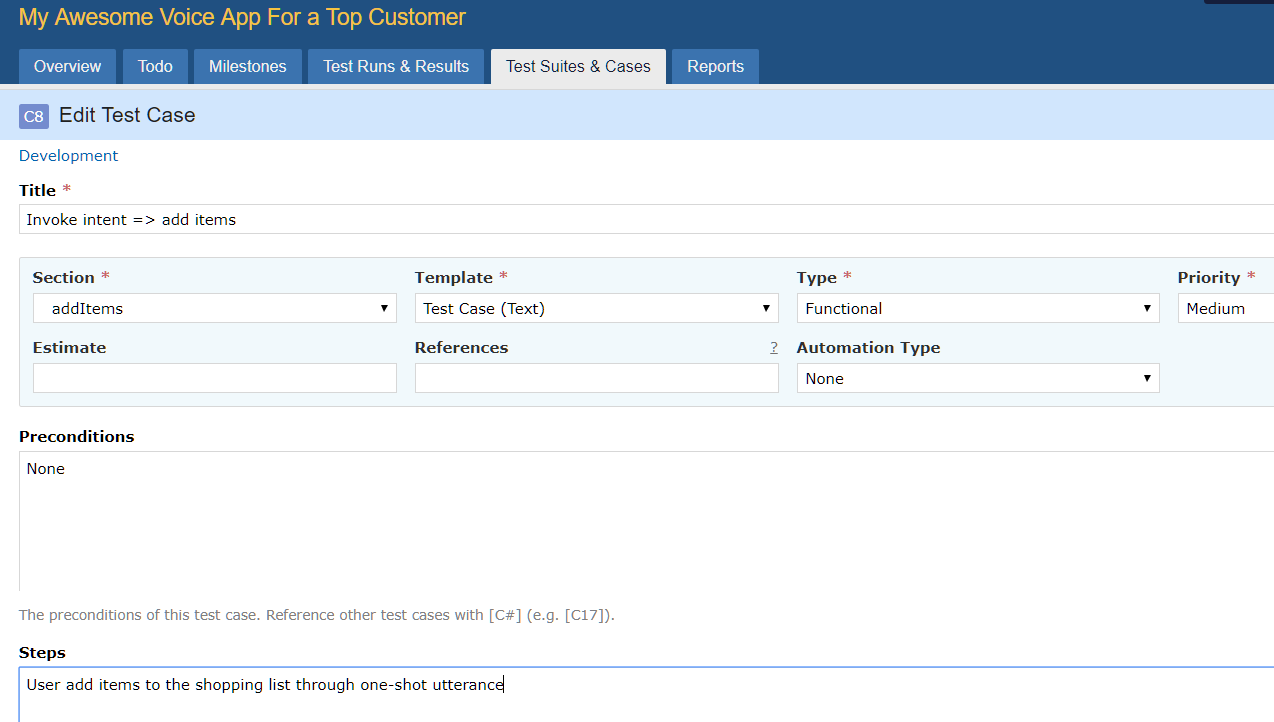
Once you have added all of your test cases, you might have something like this:
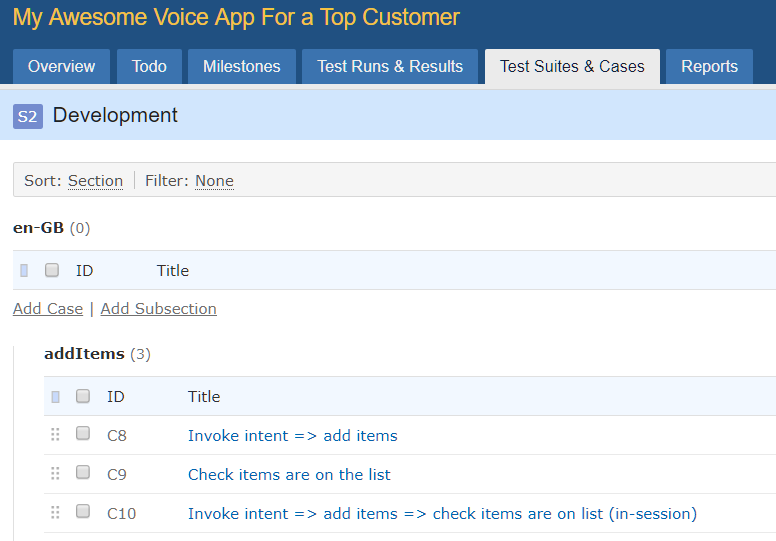
Now that you have created the test cases covering the full functionality of your voice app, we can start creating your test scripts.
A test script is a set of interactions that verify a specific piece of functionality in your voice app. It is important that the full set of your voice test scripts covers the entire functionality of your creation.
4. Creating end-to-tests with Bespoken tools
End-to-end testing involves ensuring that the integrated components of an application function as expected. The entire application is tested in a real-world scenario such as communicating with the database, network, hardware, and other applications … Techopedia
Talking specifically about voice apps, End-to-end (E2E) tests focus on verifying:
- The voice app as a whole (from Alexa/Google through infrastructure to voice app).
- The utterance resolution aka speech recognition.
- The interaction models.
E2E testing is critical to guarantee that your voice app will behave as expected before it reaches your users. Most apps work in conjunction with other services and pieces of technology. Testing only your code (i.e. just doing unit testing) is no guarantee that you are free from errors.
Bespoken’s approach to E2E testing is founded on the creation and execution of test scripts. The functional test scripts are based on Bespoken’s simple YAML syntax, which is very easy to understand, create, and maintain.
Organizing E2E test scripts in folders
The folder structure you define will depend on the type of test you will do, the languages your app support, and the platforms for which it is available. For E2E tests, we recommend storing them in a repository separate from your voice app code, which is typically maintained and “owned” by the QA team.In this example, we are going to assume that only one language is being tested, so we are going to store the E2E test script files at the root level.
If multiple languages are being tested, we recommend creating a folder for each language (see example image below):
The anatomy of an E2E test script
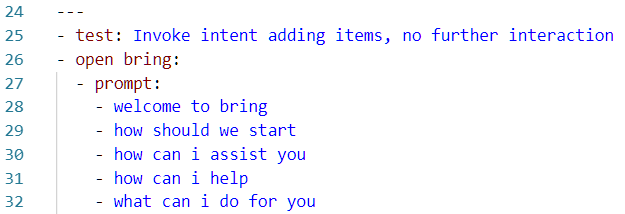
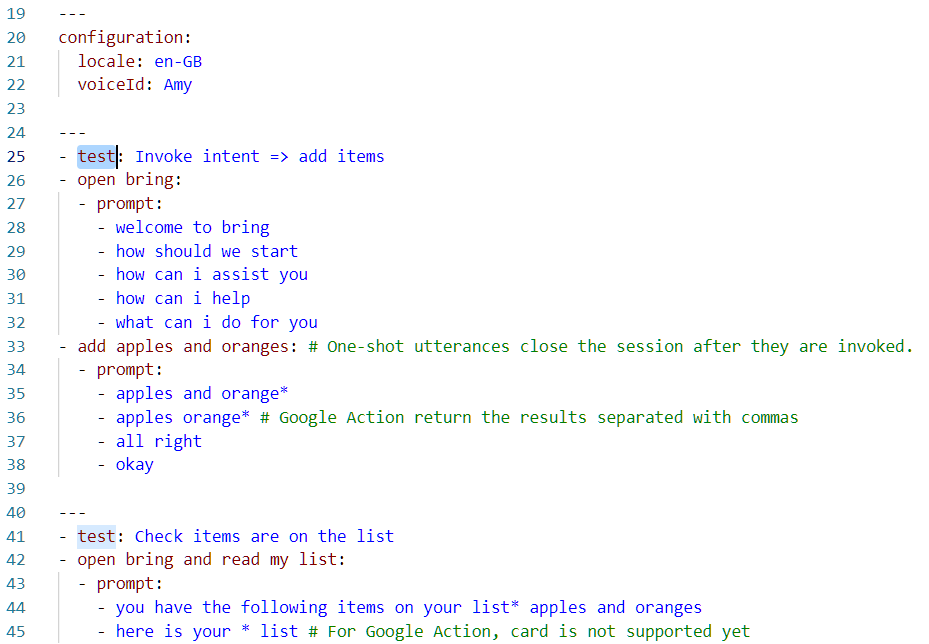
In the sample, the configuration section sets the locale (or language for which this test script will be executed) and also the Amazon Polly Voice ID to be used to send the utterances to the voice app (in this case a British accent female voice).
Each test case is a set of interactions between a dummy user and Alexa (in this sample) through a Bespoken Virtual Device. Let’s see a test case in detail:
- The test case starts with the “test” reserved word, followed by a colon and a description.
- After the test case definition, we have a series of interactions. Each interaction is made of 2 parts. On the left (before the colon) we have the utterance sent to the voice app, and on the right (after the colon) we have the expected result. Bespoken tools convert the text utterance into speech (using the locale and Polly Voice ID defined in the configuration section). Then, this audio utterance is sent to the actual voice app. Next, the audio response is translated into text. Finally, this text is compared with the expected result we have defined in the test script (the right part after the colon). So for example, we might have a simple interaction like this:
- When running this simple interaction, if we get “welcome how can i help” as an audio response, the test is going to pass.
- As voice apps evolve, it is now common to have multiple valid responses. This makes the interaction with the user richer and more engaging. When the voice app we want to test returns multiple valid responses, we can represent them using the “prompt” reserved word and then listing all the possible answers like this:
Additional configuration can be added in the testing.json file. This file is located in your test root folder. Learn more about it here.
For a deeper look into Bespoken’s E2E test scripts, please check Bespoken’s E2E documentation site.
5. Running tests with Bespoken CLI and capturing results in TestRail
Ok, now it is time to execute our tests and register the results in TestRail. Let’s see how to do it step by step.
Add a Test Run on TestRail
You start a test run to capture test results for the cases you just verified; this is done for a particular test suite. While a test suite is a plan that specifies how an application is tested, a test run is an actual test you are conducting. As we have seen in the code snippet above, it is possible to automatically add the test results using Bespoken filters and the TestRail API. With filters, it is possible to intercept the tests during their execution.
To use a filter, you first need to declare it in the testing configuration file testing.json
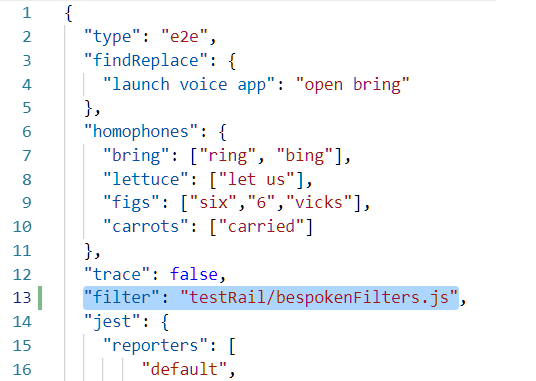
The test run is created in the initialization section, as shown in the example below:
initialize: () => {
        // Create a new run
        const result = await testRail.addRun(
            PROJECT_ID,
            {name: "Bespoken Sample Test Run"}
        );

        // Save off the run ID created by this first step
        runID = result.body.runID;
    },
Now we are ready to start executing our test cases with Bespoken Tools. Let’s see how to do it.
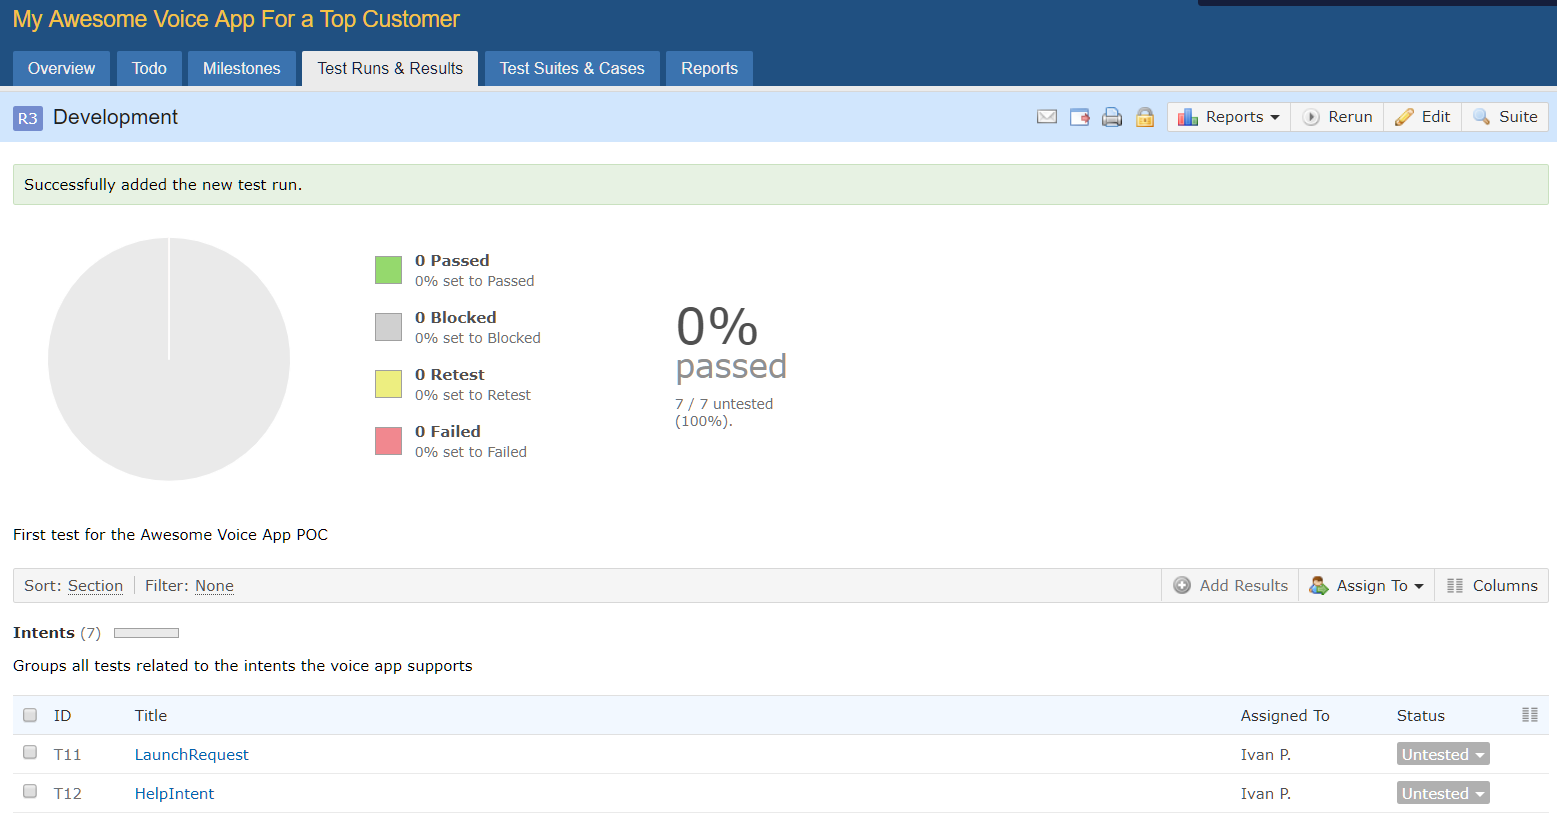
Execute your E2E test scripts
Open a terminal and navigate to the folder where you have created your E2E test script files. Start running your test cases with the test command, for example, to test the LaunchRequest test case:
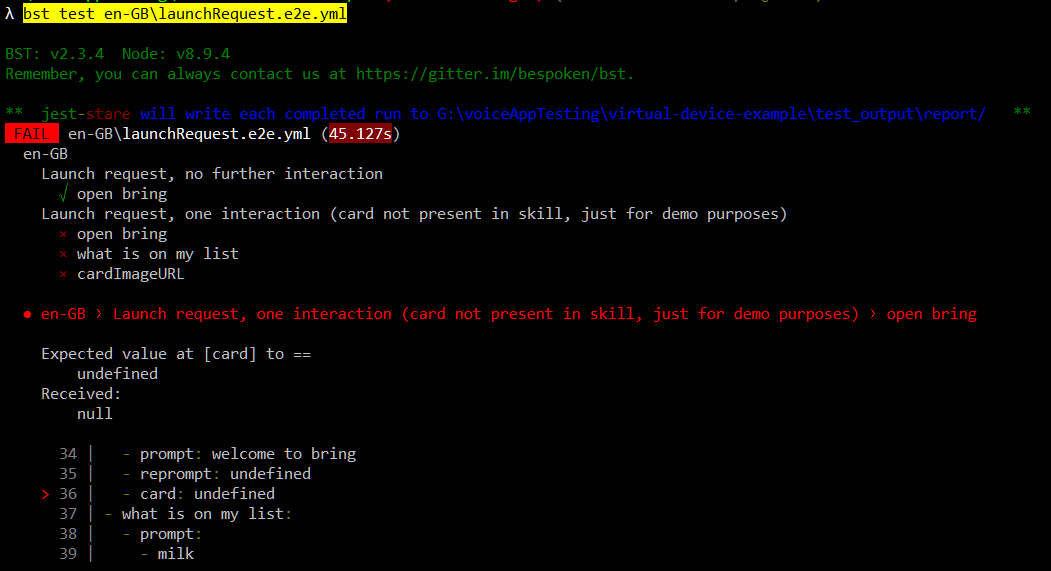
Check the results. In this case, the test failed.
You can also run all the tests you have defined in your test scripts folder by running $ bst test en-GB This command will execute all the test scripts defined for the en-GB version of your voice app.
Register the test execution results on TestRail
We can also use filters in order to add the results in TestRail automatically. In this case, we can use the onTestSuiteEnd filter like this:
    onTestSuiteEnd: (testResults) => {
        // We loop through each result, and record it in TestRail
        testResults.forEach((result) => {
            bespokenTestResult = result.passed ? 1 : 5; // 1 equals to Passed and 5 equals to Failed on TestRail
            // Look up the case associated with this test
            let testCase = testRailCases.find(case => case.name === result.test.name);
            // If the test case is not found, we create it
            if (!testCase) {
                testCase = (await testRailAPI.addCase(testRailSuite.id, {
                    title: result.test.name,
                    type: 1,
                    priority_id: 1
                }).body;
            }

            // Add the results for this test case
            testRailAPI.addResultForCase(
                runID,
                testCase.id,
                { status_id: bespokenTestResult }
            );
        });
    }
To do add the test results manually, just return to the test run you created earlier and select the test case you have just run with Bespoken tools. In our previous example, we executed the test for the LaunchRequest, so we open the corresponding dropdown menu in the Status column and then select Failed since the test execution didn’t pass.

Finally, add the details of the execution and click “Add Result”
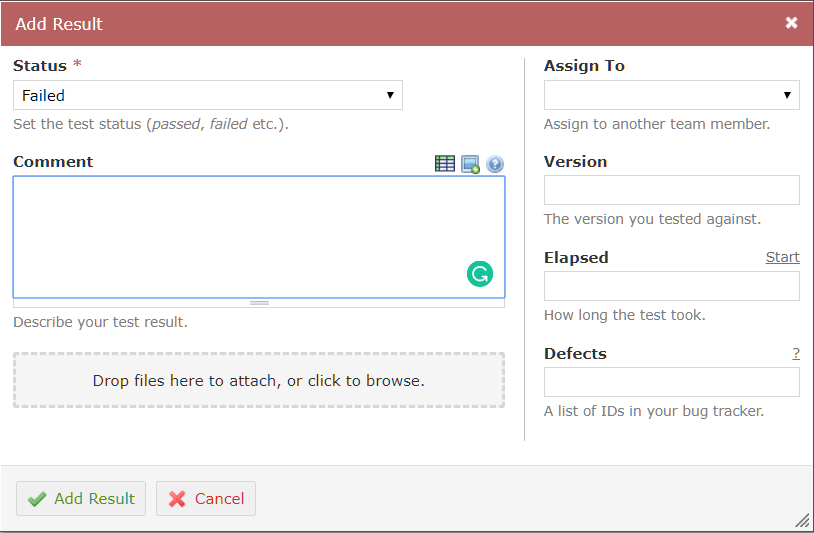
See test results on TestRail Dashboard
When you finish executing your test scripts and adding the results, you will see how this test run was:
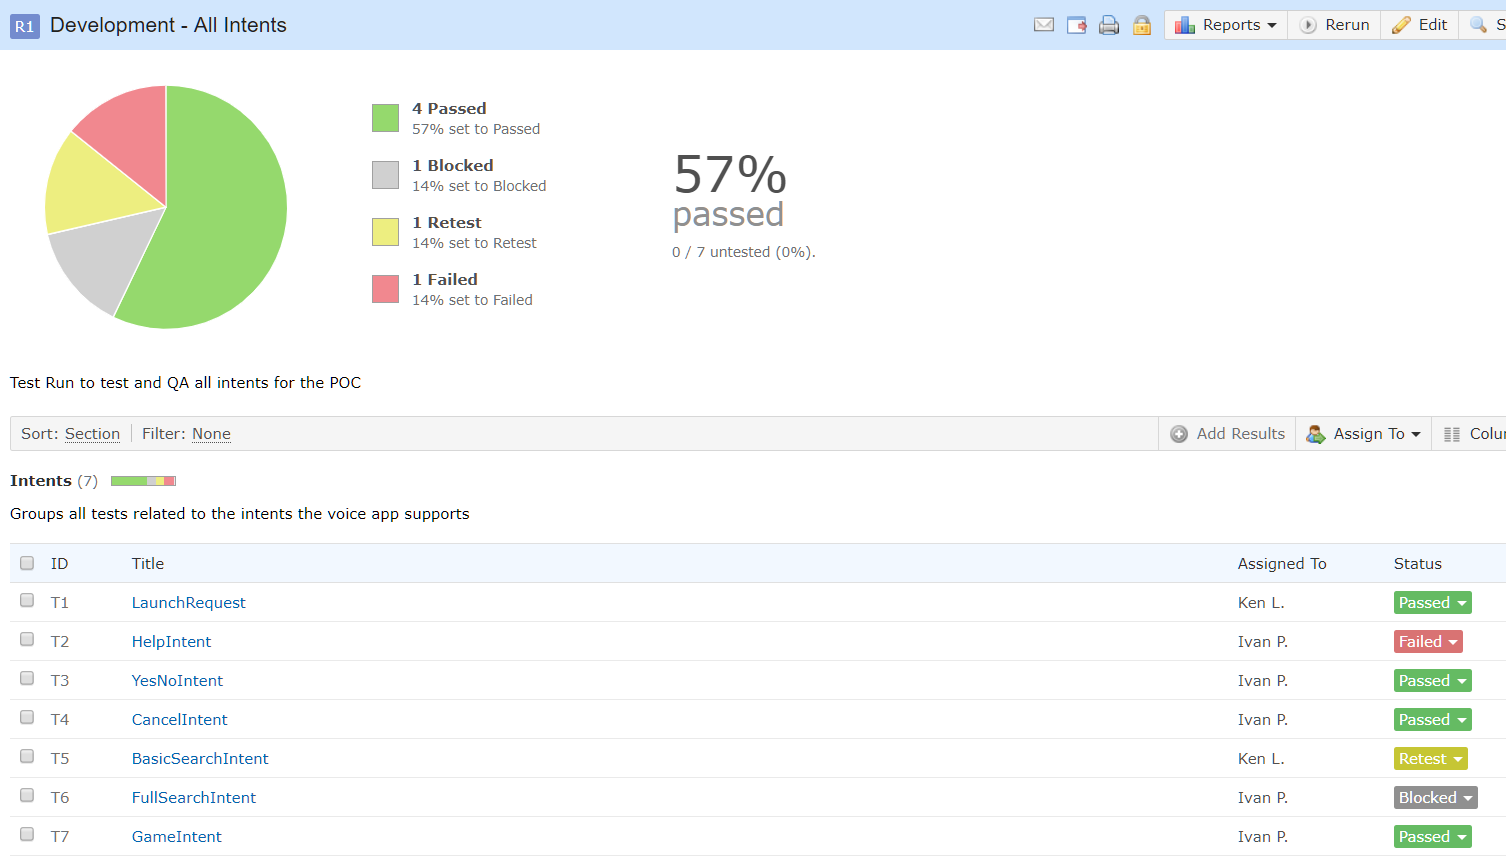
Also, in the Overview tab of your test project within TestRail dashboard, you can see the accumulated results of all the test runs you have executing during the voice app lifecycle.
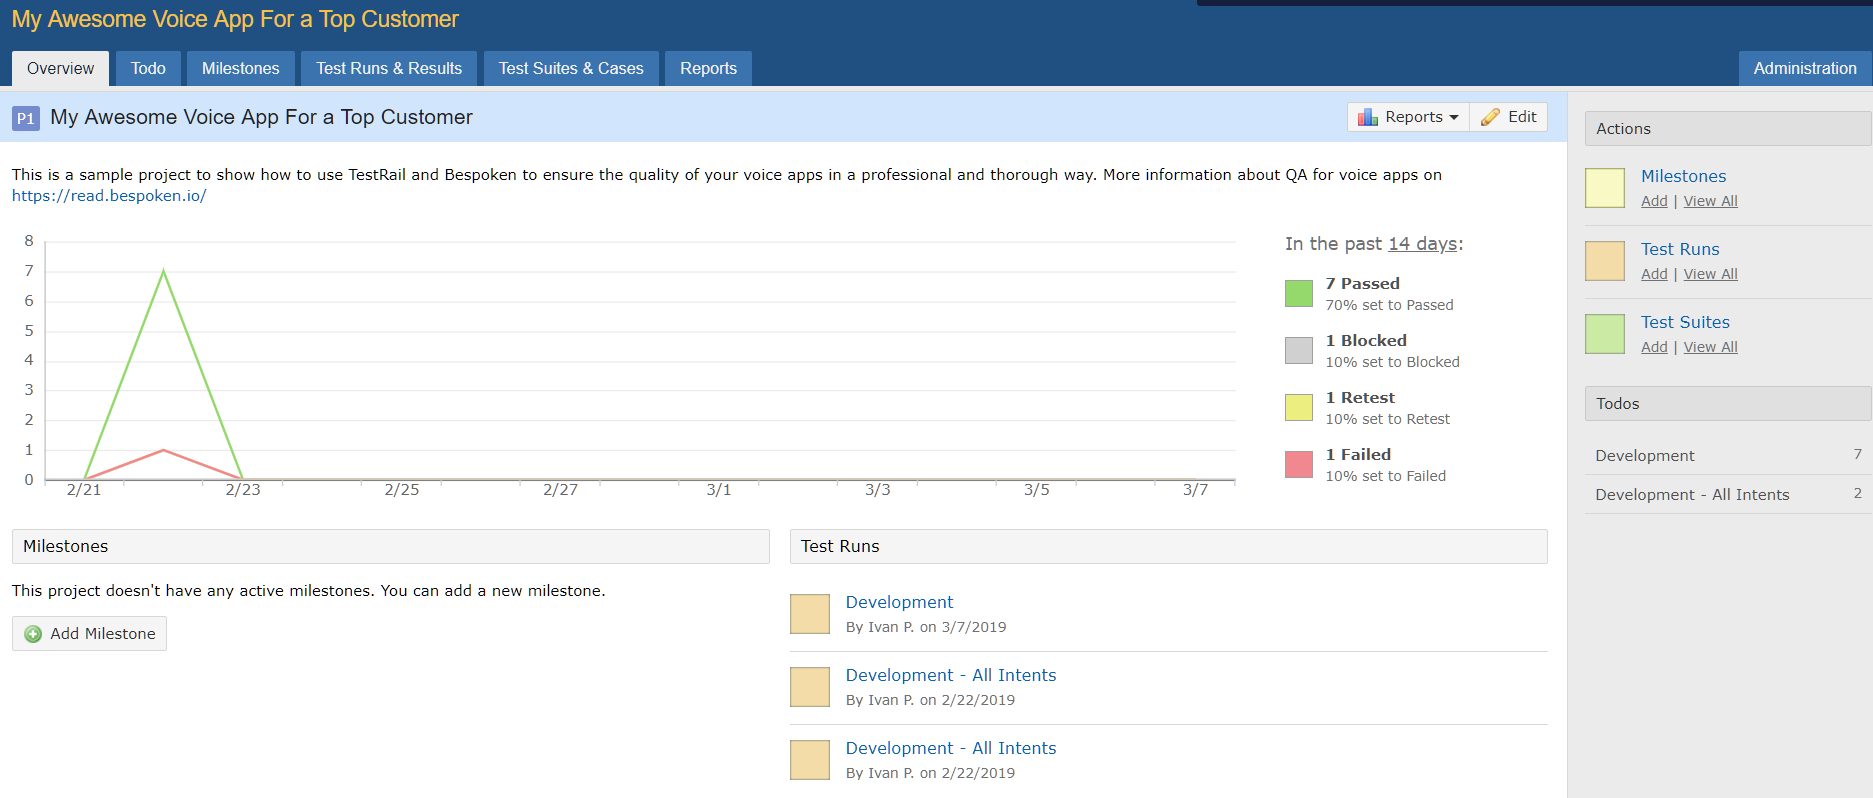
Phew! … we have covered a lot of material here . But managing your automated testing efforts on TestRail will take your voice app development process to the next level.
Remember that running automated tests consistently over time is the best way to guarantee the quality of your voice applications. Bespoken, in conjunction with TestRail, can offer great benefits like allowing the reduction of operating costs associated with manual testing and providing a complete and easy-to-use platform to manage, track, and report your voice app’s quality over time.
You can contact Bespoken here if you want a schedule a demo of their entire suite of tools. Also, please contact the TestRail team for in-depth information about TestRail.

